In this article, I will teach you how you should install your new best garbage disposal. I have written different steps that you have to follow.
However, there are materials that you need to have while installing your garbage disposal. For example, you need wire nuts, plumbers putty, food waste disposers, and wiring kit. Here are the steps:
- Remove Existing Assembly
The first step is where you have to remove all the parts of your garbage disposer kit from it’s packing the box. Start organizing the contents.
In the sink, ensure you remove the carefully existing drain and P-trap from basket assembly. Then, you should place a pan that is large below the sink that helps to catch water spilling after disconnecting the drain. You can, therefore, keep the towel close that will help to clean up the spills.
- Preparing For Assembly
In case the flange assembly will be pre-assembled, you should remove the ring where you have to loosen fasteners while preparing for installation.
- Apply Putty
Look for the flange gasket. For some kits, they usually come having rubber gasket although using the plumbers putty will be able to give your seal more lifetime.
You can, therefore, roll the putty to look like a snake that is long enough and can wrap around your gasket under the flange.
So, you will evenly press the putty on understand while moving along the edge of the pie crust.
- Clean Sink
You should clean the sink properly, and mostly at drain opening.
- Attach Fastening System
You can know to insert the flange in the top side of your sink where you will attach a fasting system at the underside. You can also put pressure on flange with the help of the second set of your hands or heavy object.
- Attach Mounting Plate
You will attach the mounting plate at the underside of your sink. Ensure you fasten the screws but avoid over-tightening.
- Remove Breakout Plate
When you are planning to drain the dishwasher automatically via the disposer, you can locate its breakout plate at the inlet port. You will remove it through punching with a hammer and screwdriver.
- Connect Wiring
There are some disposals that will not come having the power code attached. In case it’s the same to you, remove that plate using a screwdriver for you to have access to the electrical wiring.
However, while purchasing a wiring kit, ensure it has the correct power rating and also the hardware of the disposer unit.
- Attach Disposer Unit
You can now start to align rubber seal ring at the top of your disposer having flange beneath your sink. You will also secure it through rotation of the lower mounting ring.
- Connect Garbage Disposer To The P-trap
Here, you need to have a PVC cutter or hack saw that you will use to trim the extender pipe. You can, therefore, connect disposed into the P-trap.
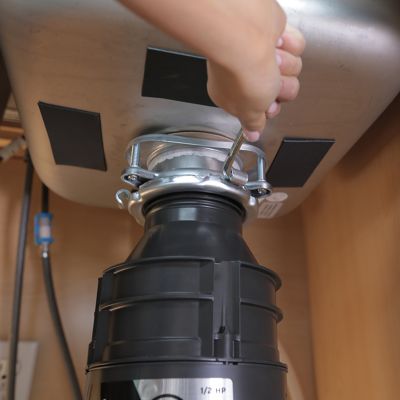
- Securing Unit
After you have assembled the drain, you can rotate it’s lower mounting ring. Tighten also with the help of a screwdriver.
- Ensure Unit Is Secure
You will test the water tightness through plugging with the drain using a stopper and fill the sink with water. To ensure you have a good seal, the putty should not leak.